

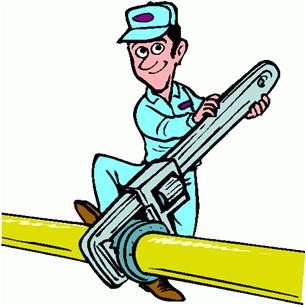
How Dto Repair A Leaking Pipe Behind A Brick Wall
How to Fix a Leaking Piping in a Wall
Leakage in the piping in a wall can take place whatsoever time. Once a pipe in the walls springs a leak, the situation tin can go out of hands in no time. As a upshot, it tin can cause a great damage to your property as information technology tin plummet. Therefore, it is actually very important to ready the leaking problem of the pipe in club to avoid any kind of bad luck or damage. You do not demand to waste fourth dimension and resources in calling an expensive repair visitor or plumber to fix the issue as information technology is a elementary action that you can set yourself as well. Nonetheless, you must have all the required equipments in hand, which are hands available in the market or the sanitary shops. At present read the given below simple steps of this astonishing guide to fix your leaking pipage in a wall and enjoy a leakage gratuitous property:
Things you will demand to fix a Leaking Pipe in a Wall:
– Compression Coupling
– Safe Sheet
– Stainless-steel Hose Clamp or C-clamp
– Two-office Epoxy Putty
– Disposable Gloves
– Pliers
– Putty Knife
– Hacksaw or Pipe Cutter with Plastic Cut Bike
Instructions
-
ane
Observe the exact location of pipe leakage
The very commencement affair you have to do is, identify the exact location of the leakage of pipe in a wall. It is ameliorate to mark the location for accuracy.
-
two
Plough off main valve of h2o
Now turn off the chief water valve of the water supply.
-
3
It is the time to betrayal the leakage
It is the time to expose the leakage by making a pigsty in your favorite wall.
-
four
Cut the wall
Use a drywall saw or a wall drill machine to cut the marked department of your wall with the h2o leakage trouble.
Note: Enlarge the hole in the wall and then that y'all tin easily fix it.
-
v
Wipe the leaking pipe dry out
Once yous exposed the h2o leakage in the wall, wipe the wet pipage dry with a piece of dry out cloth. At present rub the pipe down with sandpaper in order to remove whatever kind of oxidation or sediment around it.
-
half dozen
It is the time to ready the water leakage trouble
It is time to fix information technology with various methods. Follow the given below options to set up the leakage upshot:
Method Ane: The first option y'all have to fix the leaking pipe in a wall is the "piece of safety." Catch a piece of rubber with a length enough to cover the leaking spot. Wrap information technology around the leaking pipe and set up it with a hose clench – hands available in the market. Now, secure the applied hose clench with a socket wrench or screwdriver etc.
Note: In case if y'all practise not have a hose clamp bachelor in hand, simply use a C-clamp in order to ready the rubber over the leaking pipe.
2nd Two: The 2d method involves the hands bachelor fiberglass-resin record. Take a bowl and fill it with lukewarm water. Now, place the water-activated fiberglass-resin tape in the bowl and leave if for few minutes or until soften well. Now gently wrap it around the leaking spot in the pipe and remove all its wrinkles with gloved easily and secure it thoroughly.
Third Method: The third method is useful for the leakages around the fitting in a wall. Pick a disposable basin and place ii parts of epoxy putty in information technology. Alloy it until smooth so apply information technology over and all around the diagnosed leaking plumbing fixtures, using a putty pocketknife. Await for few hours until it dries completely.
Fourth Method: The fourth method is helpful in fixing the h2o leakage problem with the polyvinyl chloride (PVC) pipes and the polybutylene (Atomic number 82) plastic pipes. Cut out the leaking pipe with the help of a piper cutter or hacksaw with a plastic-cutting bike and slip in the pinch coupling. Now, use both of your gloved hands to secure the installed compression coupling and properly snug it with some pliers.
Note: Cut the section of leaking pipage long enough so that to slip into the compression coupling smoothly.
-
7
Check the repaired leaking pipe
At present open up the main valve and restore the water in gild to bank check out that either you have stock-still the leaking pipe in a wall properly or not.
-
eight
Savor!
Shut the hole in the wall and bask a leakage costless life.


Source: https://www.stepbystep.com/how-to-fix-a-leaking-pipe-in-a-wall-7620/
Posted by: comptoncorant85.blogspot.com
0 Response to "How Dto Repair A Leaking Pipe Behind A Brick Wall"
Post a Comment